

We all love delicious, thick yogurt, especially with a sprinkling of fresh fruit and our favorite cereal. For non-vegans, there are dozens of store-bought yogurt brands on the market, some of them of very high quality. Since there is so much competition between dairy yogurt brands, prices tend to be reasonable.
But if you are on a vegan diet, your yogurt options become limited, especially if you don't live in the USA or the UK. While many grocery stores in the UK and USA, especially in large cities, sell a wide variety of dairy-free options, good quality vegan yogurt is hard to find in other countries or small towns. Besides, in most cases prices for vegan yogurt are insane.
The option is homemade soy yogurt. Enjoy our homemade vegan yogurt recipe: How to Make Vegan Yogurt Without Starter, Awesome Trick 2023.
How you can make yogurt without a starter: Crazy trick
Vegan homemade yogurt options
You can create your own rich, non dairy milk yogurt at home using any type of vegan milk. The advantage of homemade milk is that you will end up with quality yogurt that sets correctly and consistently. Commercial vegan milk doesn't contain enough protein, and its many additives and sugar might prevent the yogurt from forming the way it should.
Making thick and creamy homemade soy yogurt is a cinch. And creating it yourself has a ton of benefits: You get to choose all the ingredients, avoiding sugar and preservatives, in addition to saving money.
I'll walk you through making dairy-free, vegan yogurt with soybean milk. However, the basic process works fine with any other plant milk.
In this recipe, We will make and use our soy milk, but you can also use any store-bought non-dairy milk like coconut milk, almond milk, soy milk, or any other nut milk or vegan milk. Using high-fat non-dairy milk, like coconut, cashew, or soy milk, results in thicker, firm greek yogurt.
When you prefer a lighter, more fluid yogurt, use lower-density milk like almond or rice milk but most cereals have a low fat and protein content, making them unsuited for yogurt-making. Whatever sort of non-dairy milk you pick, check it is additive-free. Or even better, make your own, as we do in this yogurt recipe.
So why Soybeans for the milk? It comes down to cost and availability. In North America, quality soybeans are cheap and widely available. It might be that Coconuts or Cashews are cheaper and easier to find in your country.

Homemade soy milk recipe
Soy milk is a great option to make tofu, vegan yogurt, or just as a drink. It's delicious, inexpensive, and a health-conscious alternative to dairy. And uncomplicated: Soybeans and water only. That's it.
So, what is soymilk?
Producing soy milk involves blending water and soybeans to make a creamy, milk-like liquid. Smooth milk is the result since the technique separates the insoluble fiber from the soluble soybean protein.
You can easily make plain soy yogurt at a much lower cost if you buy soybeans in bulk. You will enjoy a delicious, healthy snack at a lower per-unit price than any commercial brand.
There is much talk about non-GMO, or Organic soybeans. Don't fret too much over it. Try to get Organic soybeans from a reputable source, but try not to pay too much. Makes no sense, especially if you are trying to save by making the soy yogurt yourself.

How to make organic soy milk
So you got your quality soybeans, and you are ready to roll. Let's get down to the nitty-gritty and get our raw milk done for the yogurt recipe.
Ingredients needed to make homemade soy milk
1/2 cup of soybeans(wash the soybeans very well)
4 cups of water for processing.
If you want more soy milk, double or triple the above amount, but for your initial test run, stick to the above figures.
Preparation Instructions
Soak soybeans overnight at room temperature in two to three cups of water.
Next day set aside four tablespoons of the water where you soaked the beans(It will be your yogurt starter)
Rinse the soybeans, then discard the water.
Peel off as many of the skins as possible.
Pour 4 cups of very hot water and the soybeans into your blender
Turn on your blender and run it until you get a smooth mix.
Use cheesecloth or a nut milk bag to strain the homogenized mixture.
How can you make yogurt without a starter?
You might not be aware that yogurt culture starters are frequently called for in yogurt recipes if you're new to the world of yogurt making. Like sourdough bread, soy milk turns into yogurt bliss by living, active bacteria.
You might not be aware that yogurt culture starters are frequently called for in yogurt recipes if you're new to the world of yogurt making. Like sourdough bread, soy milk turns into yogurt bliss by living, active bacteria.
Everyone has personal preferences; however, we'd prefer not to purchase starters for the following reasons:
If you don't purchase a yogurt starter culture, you have two options: Use plain yogurt, maybe coconut or almond yogurt, as a starter or use soy soak water as your starter.

Soy soak water is the starter we will be using in our recipes because it means you will not be spending any money on a starter. Aside from the cost of soybeans, you will get free vegan yogurt.
What is the best method for making soy yogurt?
There are four different methods you can try. We recommend the fourth method, Instant Pot, which has worked the best for us. It also depends on what kitchen equipment you have or can afford.
1 Slow Cooker Method
2 Oven Method
3 The Yogurt Maker Method
4 Instant pot Method

1 Slow Cooker Method
In essence, you merely heat the milk in your slow cooker on a High setting, until it boils. The milk should reach at least 180F/83 C so any bad bacteria die off. Then turn off the crock and let it cool off.
When the milk has cooled down to at least 108 F/42 C mix in your starter. If you stir in the starter when the milk is still too hot, it might kill the starter culture. Here is where a kitchen thermometer comes in handy. The right temperatures are very important in yogurt making. Although the waiting period is approximately 15 hours, the hands-on time is only 5 minutes.
I highly advise spending a few moments straining this yogurt through three to four layers of cheesecloth. Doing that makes it more creamy and yummy.
Stick your creation in the refrigerator for at least 8 hours and then mix in your favorite fruit or cereal.
")
2 Oven Method
Preheat your oven to 200 ° C (400 °F), then turn it off.
While you are preheating the oven, boil your milk and then let it cool off down to 108F/42 C, then stir in the yogurt starter mix. Place your yogurt jars on a baking sheet on the top shelf with a light bulb on. If you have a gas oven see if it has a pilot you can light on.
Let your yogurt sit for at least 12 hours. Do not open the oven door to prevent heat loss. Make sure the oven temperature isn't above 115 F or the starter culture might die. A kitchen thermometer is a must, so you get your temperatures just right.
After 12 hours, pull the yogurt out, get rid of the excess liquid, strain the yogurt to make it thicker, and refrigerate for 8+ hours. Your yogurt is ready to eat along with your favorite fruit or cereal.

3 The Yogurt Maker Method
Since you can control what goes into the recipe, homemade yogurt will contain significantly less sugar than store-bought yogurt. Additionally, using the reusable jars that many electric yogurt makers have, benefits the planet. Far better than using all of those plastic disposable yogurt tubs.
The yogurt maker has the most consistent temperature, so it is optimal. But it takes half a day to produce a small yogurt batch. Not enough if you have a large family with teens. The yogurt that took you one day to make will last 15 minutes. Ouch.
But if you want to enjoy the ease and quickness of a Yogurt Maker and you are ok with getting small amounts of yogurt, the procedure is the same as the Crockpot or Oven method above.
The procedure is similar for most automatic yogurt makers with individual glass or plastic containers. However, do read your machine's booklet for specific instructions.

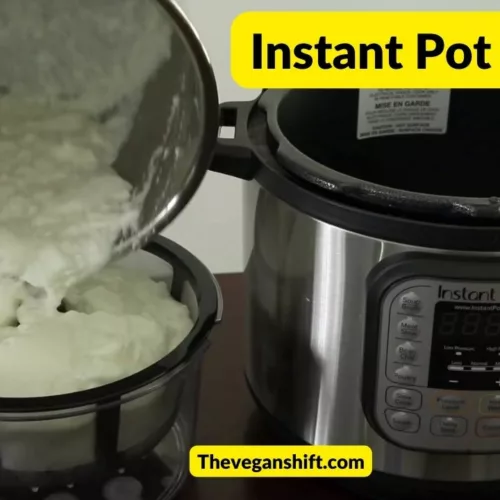
4 Why you should use the Instant pot Yogurt Method
Our favorite method. You can make larger amounts of yogurt in an Instant pot with a yogurt-making setting and the results are also consistent.
An instant pot is worth the price if you want decent amounts of yogurt made right from day one. It is easy for your yogurt adventures to fail if you try to pull it off by playing guessing games to get the right temperature for the fermentation process.
An Instant Pot with a yogurt maker setting functions as a heated bowl that maintains the desired yogurt temperature for a set amount of time.
Instant Pot Advantages
If you want to make yogurt frequently, in quantity, it makes it lots easier and is worth the initial expense. You don't need to make tiny jars of Yogurt. Only pour it into the instant pot, and you're ready to go!
Making 8 cups of yogurt by doubling the recipe is so easy.

How to make vegan soy yogurt in the Instant Pot.
Ingredients
Procedure

Yogurt Making Pro Secrets
Let's share some tips for successful yogurt making so you get your vegan yogurt treat right every time.
Mix very well
Whatever starter you use, mix it very well with your raw milk to get your yogurt right every time. DO NOT shake, stir, or disturb the milk-starter mix once the fermentation starts. You might upset the process.
Patience is king
Your first yogurt batch might not turn out so great. It is normal; do not be alarmed. Your yogurt won't taste fantastic until you save your vegan yogurt starter and create another couple of batches. It keeps getting better and better.
You will find that even after using the same vegan yogurt starter for several months, each batch keeps coming out better each time.
If, at any time, you see your starter stops working or starts to smell funny, throw it out and start over.
Get rid of excess water
When your yogurt sets, let it cool to room temperature and scoop out any excess liquid that accumulated on top. You can also strain it with a cheesecloth or the strain provided by your Instant Pot. You can also purchase a yogurt strainer on the market. Then transfer it to containers that have a tight seal.
Starter Yogurt Storage
It can be challenging to resist finishing the final 1/2 cup of yogurt, especially if you have family members who might unintentionally eat it.
Keep your starter in clean glass containers with snap-on lids to keep the air out.
Store the yogurt for the family's use in the container that contains 4 cups, and then place a half cup of starter yogurt in the smallest container and label it "Starter", so that no one touches it.
If you don't have an Instant pot
Find a way to keep your yogurt at a constant temperature of roughly 112 degrees F(44.5 Celsius) for 12- 15 hours if you're not using an Instant Pot. The three methods above offer easy options.

FAQ
Q.What can I use as a Vegan yogurt starter?
A. There are four main alternatives:
Store-bought Yogurt as starter.
Pick plain sugarless Vegan yogurt.
Add a tablespoon of store-bought soy yogurt to a 2-pint jar of Soy Milk. Put as many jars as you wish in the Yogurt maker if you want more product. Mix thoroughly.
If you are using an Instant Pot, set it to the "yogurt" setting and let the jars or the full pot sit there for 12–14 hours.
Pull out, skim off the excess liquid and Refrigerate for +8 hours for a thicker yogurt. Add maple syrup and your favorite fruit or cereal. Enjoy.
Non-dairy yogurt cultures as starter
Mix 1 quart of pure soy or coconut milk with one packet of Vegan Yogurt Starter. Shake vigorously after replacing the cap.
Put the mixture in two-pint jars and place in the instant pot for 12 to 14 hours on the "Yogurt" setting. Refrigerate for at least 8 hours, after skimming off excess liquid off the top. Strain the yogurt to enjoy a thicker yogurt.
Set aside half a cup of the product to use as a starter. That way, you will not have to buy so much culture for future batches.
Enjoy delicious homemade coconut yogurt.
Probiotic capsules as starter
Mix one quart of pure vegan soy milk with one probiotic pill (25 billion CFU). Put the cap back on the bottle and shake vigorously.
Drain the bottle into a 2-pint glass jar and place for 12 to 14 hours on the yogurt setting in the Instant Pot.
After straining the excess liquid out, place it in the fridge for at least 8 hours. The yogurt is ready for your enjoyment.
Soybean soak water as a starter
This is the method of choice when you make the soy milk yourself. After soaking the soybeans overnight, set aside three tablespoons of the soak water as your starter. After you make the first batch, then use half a cup of the homemade yogurt produced as the starter from then on.
This is the best method for those that need lots of vegan yogurt on the cheap. Your only cost is purchasing the soybeans and of course, the Instant Pot(A one-time cost). Check the Vegan Yogurt Instant Pot recipe here.
This is the best method for those that want to obtain lots of vegan yogurt on the cheap. Your only cost is purchasing the soybeans and of course, the Instant Pot. Nothing else.
Q.Can I use regular yogurt as a starter for vegan yogurt?
A. Yes, Yogurt is a good option as a starter. Any yogurt, vegan or otherwise, will do as long as it has live, active cultures. Use plain yogurt without sugar or too many additives.
Instead of using probiotic capsule powder or a packet of cultures, stir in a tablespoon of yogurt in a quart of milk. Shake hard. Then pour the liquid into an Instant Pot. Set to "Yogurt". Let it be for 12-14 hours. Pull out and refrigerate for 8 hours. For a step-by-step guide go here.
Q. Is it cheaper to make vegan yoghurt than to buy it at the store?
A. Danielle over at Projectmealplan came out with all the calculations in her article “Store Bought Vs. Homemade Greek Yoghurt: Which Is Cheaper?”
In the end, she concludes that:
The price per ounce for the 35.3-ounce container of Fage Greek yoghurt is 19.8 cents.
A gallon of dairy milk yields 72.6 ounces of Greek homemade dairy yoghurt, which takes about 1 hour and 21 minutes of labor to complete. Each ounce costs 5.19 cents in ingredients and 1.11 minutes of work time.
These figures prove that making your yoghurt at home is around 14.61 cents CHEAPER PER OUNCE.
35.3 ounces of Fage Greek yoghurt retail for $6.99 before tax at the shop. A similar amount of yoghurt costs $1.83 when made at home.
Solid proof that making your Greek yogurt at home is WAY CHEAPER!
Of course, these numbers are for dairy yoghurt. But you will find out that when making dairy-free yoghurt, savings upwards of 75% are possible, also.
And you will enjoy a sugar-free, preservative-free, thickener-free snack.
How to make vegan yogurt in an Instant Pot
Equipment
- 1 Instant Pot
- 1 Blender
- 1 Cheesecloth Strainer
Ingredients
- 3 tbsp Soybeans soak water Best if non-GMO
- 1 quart Homemade Soy Milk Recipe found in this same article
- 1 Pinch Salt
Instructions
- Use a quart of homemade soy milk. Boil your milk and then let it cool off down to 108F/42 C.
- Optionally, pour an unopened quart bottle of store-bought soy milk into your Instant Pot.
- Add three tablespoons of the soybean soak liquid you saved before as the starter. You can also use some yogurt starter you have saved from the other batches if this is not the first time you make yogurt.
- Stir the mix vigorously remembering to add the salt.
- Set your Instant Pot to "Yogurt."
- Fifteen hours later, you'll find gorgeous, creamy, vegan soy yogurt.
- Strain the yogurt using the provided screen to get rid of the excess liquid.
- Refrigerate for +8 hours
- Add your favorite fruit or cereal.
