

Playing around with yogurt-making has always been a family tradition. My wife is lactose intolerant. Looking for dairy alternatives, we found a common interest in the vegan lifestyle.
I have always been a yogurt lover, so sharing dairy-free yogurt with my wife, knowing it won't make her sick, is always such a joy. Savoring together this creamy, thick, dairy-free yogurt recipe with only three ingredients is so satisfying.
I know this vegan-friendly, dairy-free Instant Pot Coconut Milk Vegan Yogurt will become the perfect substitute for anyone with a dairy allergy or lactose intolerance.
As a bonus, we share a complete cashew milk vegan yogurt recipe at the end. Whatever you pick to make, we hope it improves your quality of life the way it did for us. Let us know in the comments how it went for you.
Disclaimer: Theveganshift.com is an Amazon Associate in the Amazon affiliate advertising program. We also participate in other affiliate programs that offer value to our readers. There might be some affiliate links in the content below.
This blog does not offer medical advice. Consult with your Medical Doctor about taking any natural treatment before starting any diet or exercise program.
Coconut Milk Instant Pot Vegan Yogurt Recipe
In our search for an easy way to make the perfect yogurt, we have been looking for the best and most budget-conscious way to get the most delicious vegan yogurt.
In a recent post, How to Make Vegan Yogurt Without Starter: Awesome Trick 2023, we shared three methods to get creamy, inexpensive vegan yogurt.
In our search for an easy way to make the perfect yogurt, we have been looking for the best and most budget-conscious way to get the most delicious vegan yogurt.
Back then, we used homemade soymilk instead of dairy milk to get Greek yogurt with little effort every time.
In this article, we go in-depth with the third method, Instant Pot yogurt, but using coconut milk this time around.
Instant Pot Coconut Vegan Yogurt Recipe
Getting vegan homemade yogurt from commercial plant-based milk is nearly impossible. The problem is that store-bought yogurt is full of chemicals and stabilizers that throw off the fermentation process.
So homemade plant milk is the way to go. The problem is the time and effort it takes to make vegan milk and yogurt once we have the milk.
It takes too much time and effort. The time you might not have.
Wouldn't it be nice to buy vegan milk, dump it in the instant pot or yogurt maker, and get creamy yogurt every time?
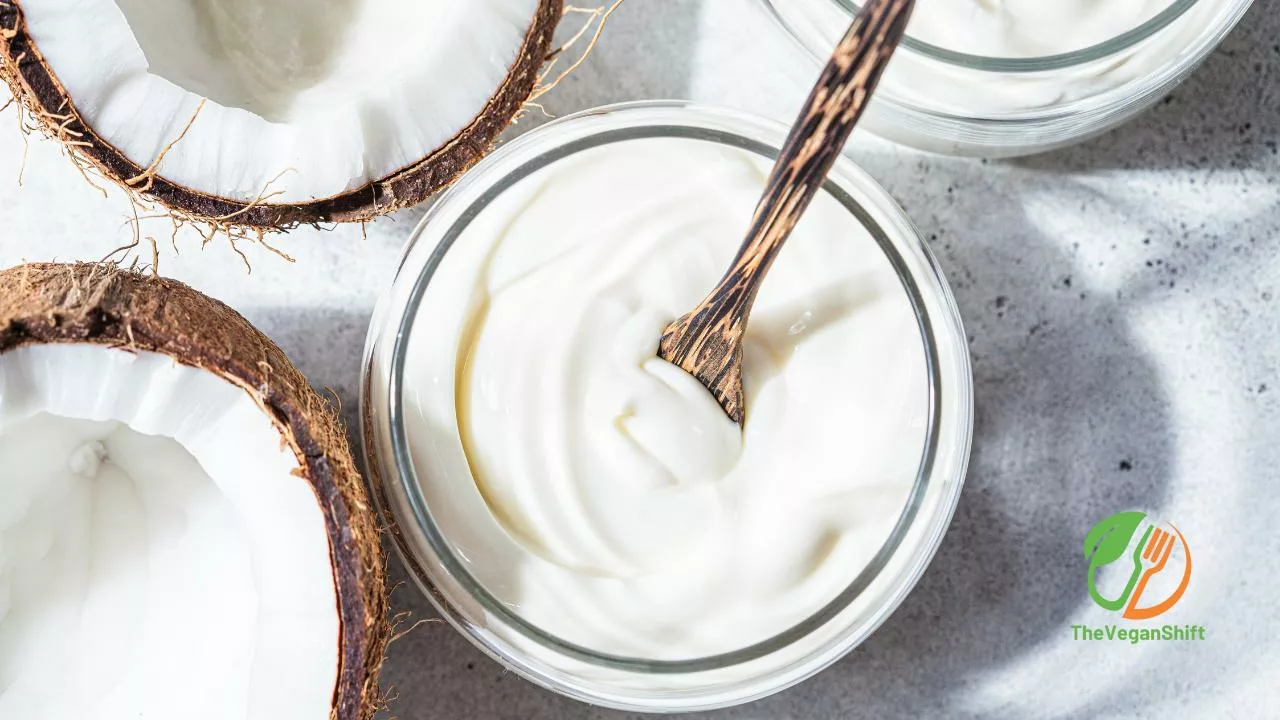
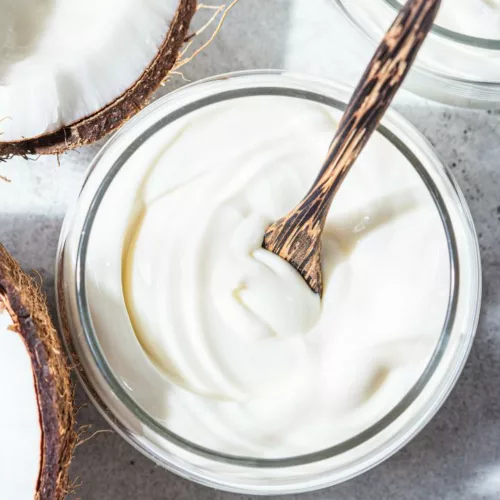
So it makes me so happy to share the secret for making effortless yogurt from commercial vegan milk: coconut canned milk yogurt.
You will love the creamy, rich, and indulgent flavor of coconut milk yogurt made from commercial vegan milk.
Keep reading. Thank me afterward.

Is it worth it to make vegan yogurt in an instant pot?
It is so simple to make your own yogurt in the Instant Pot, whether it is dairy-free or not.
The Instant Pot is the solution if you've ever been scared of making homemade yogurt. It's almost easier than buying coconut yogurt from the supermarket because it makes the process simple and hands-off.
And my goodness, making yogurt at home can help you save a ton of money, especially if it's dairy-free.
A five-ounce cup of store-bought coconut milk yogurt costs roughly $1.99 at our neighborhood supermarket. For less than $4, you can prepare an entire quart—32 ounces—of Instant Pot coconut yogurt.
To purchase that much premade would cost you $12.74! That quickly adds up when you consume as much yogurt as we do.

Another huge benefit: You can customize every aspect of your yogurt, including its thickness, tanginess, and—for me, most significantly—its probiotic content.
The process used to make commercial yogurt only slightly ferments yogurt. According to some reports, this fermentation process can take as little as one hour.
You don't acquire too many beneficial bacteria in an hour.
Yogurt fermented for 24 hours contains billions of more beneficial bacteria than any supplement.
Also, it tastes much better than taking a tablet.
Ingredients for Coconut Yogurt
This yogurt recipe calls for just three components. You must use the components I recommend.
Trying something new can result in drastically different outcomes. Changing one or more of these ingredients could easily lead you to fail and waste time, effort, and ingredients.

The ingredients are Organic Coconut Milk, a Yogurt starter, and a Thickener.
Coconut Milk
You must use canned full-fat coconut milk containing only coconut, water, and guar gum. PERIOD!
Never use canned light coconut milk, milk that has been in a chilled or shelf-stable environment or long-life vegan milk.
Look for organic, full-fat canned coconut milk with no added sugar. Free from any additives aside from guar gum. If you see on the label any other stabilizers or preservatives, it is a no-go.
Trying something new can result in drastically different outcomes. Changing one or more of these ingredients could easily lead you to fail and waste time, effort, and ingredients.
Trying something new can result in drastically different outcomes. Changing one or more of these ingredients could easily lead you to fail and waste time, effort, and ingredients.
Yogurt starter
Making yogurt for the first time requires live active cultures to curdle the milk. There are a few initial options available to you.
Both plain yogurt and probiotic capsules are options as a starter culture.
When using pre-made yogurt, use plain, unflavored, unsweetened yogurt.
Also, if you use dairy yogurt as a starter, your yogurt will no longer be suitable for vegans or anyone who avoids dairy.
For your first batch of vegan yogurt, I advise buying a vegan yogurt starter and reserving 1-2 tablespoons of your homemade coconut yogurt to use as the starter for the subsequent batches. In the long term, you will save money by doing this.
Thickener
As cow milk's yogurt has a different protein composition than dairy-free yogurt, the latter will never become as thick.
So, for best results, you must add a thickener to make creamy, dairy-free yogurt.
Beef gelatin powder works best, but go for agar agar powder to stay vegan-friendly.

Making coconut Yogurt instructions
The main equipment for this recipe is an Instant Pot that has the Yogurt function. It makes the whole procedure easy and fast.
First Step: Dissolve the Agar Agar in the Coconut Milk
It is significant to note that coconut milk in cans has already undergone pasteurization. Therefore, do not heat the milk to 180 degrees.
To dissolve the agar agar, we need to heat the coconut milk to about 110 to 115 degrees. This process aids in emulsifying the coconut milk fat into the liquid.
It is significant to note that coconut milk in cans has already undergone pasteurization. Therefore, do not heat the milk to 180 degrees.
Use your Instant Pot's yogurt feature to warm up the coconut milk. When the pot says "boil," hit it once more.
Use your Instant Pot's yogurt feature to warm up the coconut milk. When the pot says "boil," hit it once more. Add the coconut milk and agar agar, and mix everything thoroughly. Keep an eye on the yogurt's temperature with a digital thermometer.
It should be between 110 and 115 degrees. Turn the Instant Pot off when it reaches that temperature.
Second Step: Strain the Coconut Milk
Pour the mixture through a mesh strainer lined with cheesecloth once the coconut milk has reached a temperature of 110–115 degrees. The yogurt will be much smoother as a result.
Mix your probiotic capsules or any other starter well into the milk. For every 15 ounces of canned coconut milk, you need 1/4 teaspoon of probiotic capsules or one tablespoon of plain, pre-made yogurt.

Third Step:Ferment the Coconut milk
Now we have to allow for the fermentation process for the magic to happen.
You have a few choices on how to incubate yogurt and how long to incubate it. Let's jump into it.
As a first option, you can pour the yogurt mixture back into the Instant Pot's inner pot and wait for it to incubate. Remember that after your yogurt has finished incubation, you must let it alone and store it in the refrigerator for at least 8 hours before using.
Your inner pot will not be available for an additional eight hours.
Another option is to pour your milk mixture into a heat-safe glass jar, and then put that jar on the trivet inside your immediate pot if you want the flexibility to use your inner pot while your yogurt sets in the refrigerator.
You must also include 1 cup of warm water (yogurt incubates at 110-115 degrees, so I like my water to be the same, right temperature).
Your Instant Pot is ready for use however you choose once you remove the glass jar from the yogurt and put it in the refrigerator.
You must set the cycle for a minimum of 8 hours and a maximum of 24 hours to incubate yogurt.
The yogurt thickens and becomes tangier, and more probiotics develop as time passes. I like the flavor and texture of yogurt fermented for 24 hours better.

Tip: Select yogurt and press the adjust button until the time displays 24:00 to set the incubation period. Time can be changed using the +/- buttons if you prefer a different period.
Fourth Step: Refrigerate the yogurt
After the yogurt completely ferments, remove it and refrigerate it for at least eight hours.
If your yogurt seems a little thin, don't worry; it will thicken as it sets up in the refrigerator.
Fifth Step: Enjoy your homemade, dairy-free yogurt.
You might see that the yogurt has separated once it has had time to set up in the refrigerator.
It is typical and results from coconut milk's high-fat content. Just whisk to remix, then enjoy with your favorite topping, fruit, granola, or whatever... ????????
cashew milk vegan yogurt recipe
This recipe has a little bit more work since we are not using store-bought milk.
We are using raw cashews to make the milk. Then we make the yogurt off the milk we just made.

Cashew Yogurt Ingredients
1 cup raw cashews (simmer overnight in water at room temperature or for 30 minutes in hot water)
2 cups filtered water
1 1/2 teaspoon agar agar or gelatin
1 tbsp maple syrup
1 capsule, Probiotics
Cashew Yogurt Instructions
Before preparation, soak your cashews in water for at least 24 hours or for 30 minutes in hot water.
After two thorough rinses in clean water, add the cashews and filtered water to the blender. Mix on high for a few minutes until smooth.
To cook the mixture, add it to your instant pot and select "boil" (my yogurt setting has a boil option if you press the yogurt button a few times).
Once your machine whistles to indicate it has finished, check the temperature to see if it is 180 degrees.
Now add the agar agar and stir rapidly to prevent clumps.
When the mixture has cooled to about 105°, stir in the probiotic capsule (spread it in by splitting it in half) and the maple syrup.

Set the timer for 12–16 hours using the yogurt setting (the longer you cook it, the tangier it will be).
If you prepare this recipe, you will end up with a thick, greek-style yogurt.
If that's too thick for you, you may also add extra water at the beginning to produce a thinner yogurt or use a bit less agar agar.
Keep in the refrigerator in an airtight container for no longer than a week before consuming.
If you wish to produce more yogurt at once, you can double (or probably quadruple) the recipes above.
These yogurts go best with fruit, granola, and a little honey or syrup on top, but serve your yogurt with whatever tickles your taste buds.
Tip: One-fourth cup of yogurt can replace one probiotic capsule, so setting aside a cup of plain yogurt for future batches will save you money. You will avoid having to purchase further probiotic starter capsules.
You might also enjoy

How do you thicken vegan yogurt?
Vegan yogurt requires an additional ingredient to achieve the ideal texture.
Dairy yogurt relies on natural proteins to give it a thick and creamy consistency. Agar agar flakes and tapioca starch are two well-liked options for vegans.
Tapioca starch: When added immediately to milk, tapioca starch will clump up and make a mess. Instead, combine 1/2 cup milk and 2 teaspoons tapioca starch in a small dish to make a slurry. Mix until smooth.
Agar agar: Agar agar is a vegan alternative to beef gelatin. (Gelatin is an animal-based product, whereas agar agar comes from seaweed.) Pour two tablespoons of agar agar on top of the milk to use it. Let the flakes rehydrate for 5 minutes without disturbing them.
Instant Pot Coconut Milk Vegan Yogurt
Equipment
- 1 Instant Pot with Yogurt Function
- 2 Large Glass Pots
Ingredients
- 1 can 13.5 oz can full fat organic coconut milk should include only organic coconut, guar gum, and water.NOTHING ELSE
- ¼ tbsp yogurt starter culture or 1 Tbsp vegan yogurt
- 2 tbsp Agar Agar Powder
Instructions
- Thoroughly clean the inner pot. The inner pot should be filled with boiling water, given a few minutes to sit, and then the water should be drained and dried. This will ensure that your instant pot is thoroughly cleaned and sanitized.
- To heat the coconut milk up, hit the Yogurt function on your Instant Pot. Hit yogurt again until it reads boil.
- Add the coconut milk and agar agar, then whisk to combine. Keep an eye on the yogurt's temperature with a digital thermometer. It should be between 110 and 115 degrees. This only takes a little while. Turn the Instant Pot OFF when that temperature is reached.
- Pour the coconut milk mixture through a mesh strainer that has been covered in cheesecloth.
- To thoroughly blend, whisk in the powdered starter (or one tablespoon of plain coconut milk yogurt).
- Pour the yogurt mixture back into the inner pot to incubate, and let it incubate. Alternately, you might pour the yogurt mixture into one or more heat-safe glass jars and set them on the Instant Pot's trivet. Fill the inner pot with 1 cup of warm water also.
- Place the lid on the Instant Pot and then set the incubation time. To set the incubation time, hit the yogurt function and then adjust function until the time reads 24:00 (be sure the temperature is at normal and not low--if the temperature is at low, hit yogurt until normal is lit up. ) You can then use your +/- buttons to adjust the time if you desire a different amount of time for incubation.
- After the yogurt has been incubated, take it out of the Instant Pot and refrigerate it for at least eight hours, untouched.
- When the yogurt has been sitting for eight hours, mix it to combine the fat solids and liquids before serving. You can now choose to add the sweetener or topping of your choice.
Video
Notes
Incubate the coconut milk yogurt for 24 hours for a creamy, tangy result. Set the incubation time between 8 and 12 hours for thinner and less tart yogurt.
After the yogurt has chilled for eight hours, I usually add one tablespoon of maple syrup and 1/2 teaspoon of vanilla extract to sweeten it.
It is possible to double or triple this recipe.
